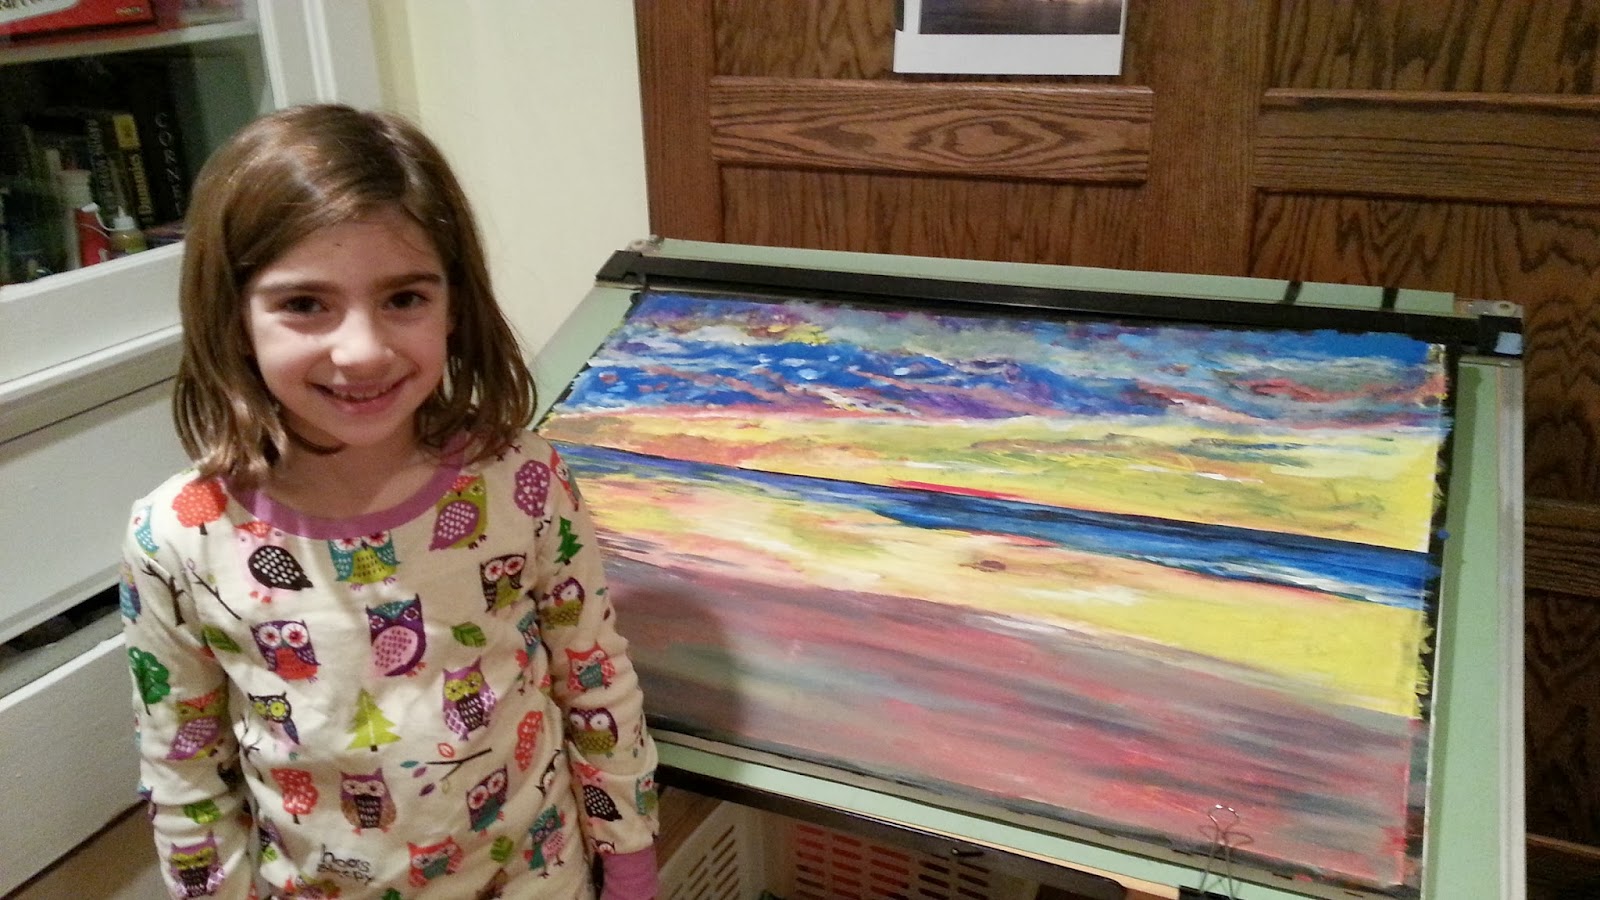
Finished product of our "Painting With the Kids" project. (see our previous post). Oliver (the 4 year old) did not want to sign his name yet. A fun project with the kids and a great way to spend indoor time.
Now, where to hang it . . . .
ABOUT US
- MPINK DESIGN CHICAGO, IL
- Josh Pincus and Claudia Mendelson created MPink Design LLC. in 2006. MPink Design offers a full range of design services, including: Residential and boutique commercial building design, interior design and decorating, exterior and interior planning, kitchen and bathroom design, basement design, full home renovations and additions, custom furniture design, new custom residences and space planning for home, office and retail. MPink Design can help you create the space you were dreaming of or the one you never thought was possible. At MPink Design, we believe that design should be approached with new and innovative ideas. We focus on solutions that maximize the potential use of your space and combine these solutions with a critical attention to detail and materials while also providing service that is efficient in time and cost.
Thursday, February 20, 2014
Friday, February 14, 2014
SURVIVING THE POLAR VORTEX
We are so close to finally escaping from the polar vortex.
So, how did we all make it through? We’ve heard a number of ways families with
young children have survived the winter and we thought we would share one of
the ways we were able to spend time with our children, inside . . . without
going totally nuts.
PAINTING WITH YOUR KIDS
1.
Get a canvas and some acrylic paints. Canvases
are really inexpensive now and you can find one easily at your local Michael’s
or better yet, your locally run art store (if there is one). And don’t get a
little canvas. Get a BIG CANVAS. One big enough for your kids to go “wow, this
is going to be really awesome!”. And also big enough for you to reply, “this is
going to take some time and we’re going to try and fill it all up.” (18x24 or bigger should do) Yes, as artists
we’re taught all about negative space. That is, the space we don’t fill up on a
page. But if we told our 4 year old son that he didn’t need to fill up the
canvas, he’d been finished in about 5 minutes. When you have your child look at
all parts of the painting they will learn to assess their work and it’s also
important in making the activity long lasting (important for a winter activity).
2.
Print out a photo and tape it above the canvas.
Find one together with your kids. We printed out a picture from a trip we’d
taken together. It makes the painting personal for your kids.
3.
Turn up the music and mix some paints. We used a
piece of cardboard and a plastic mixing palette. You can use either although
the cardboard tends to soak up acrylic paints pretty quickly. Spend time
showing your children how the primary colors mix together to make any color
they want and try to show them how you can match the colors in the photo to the
colors you’re mixing on the palette. Of course don’t be too exact (if you can
help it) so that they don’t feel like they have to mix for hours, but it’s good
to get them to understand that they can do more than just dipping the brush in
the primary color and throwing right on the canvas.
4.
Outline the painting. Ok, you could let them go
at it all by themselves, but we found that if we outline the painting a bit
before they jump right into it, it helps keep them focused and understand the
link between the photo and the canvas. This will vary greatly depending on the
age of your children. Ours are 8 and 4 so they have different skill and
attention spans.
5.
Paint together. Make it a group activity. Use
different size brushes and help them fill in sections when your kids start to
get stuck on one part of the painting. Make sure to remind them to move around,
step back, and most of all, have fun!
6.
Take a break, let it dry and start a second
layer. The more layers, the longer the project.
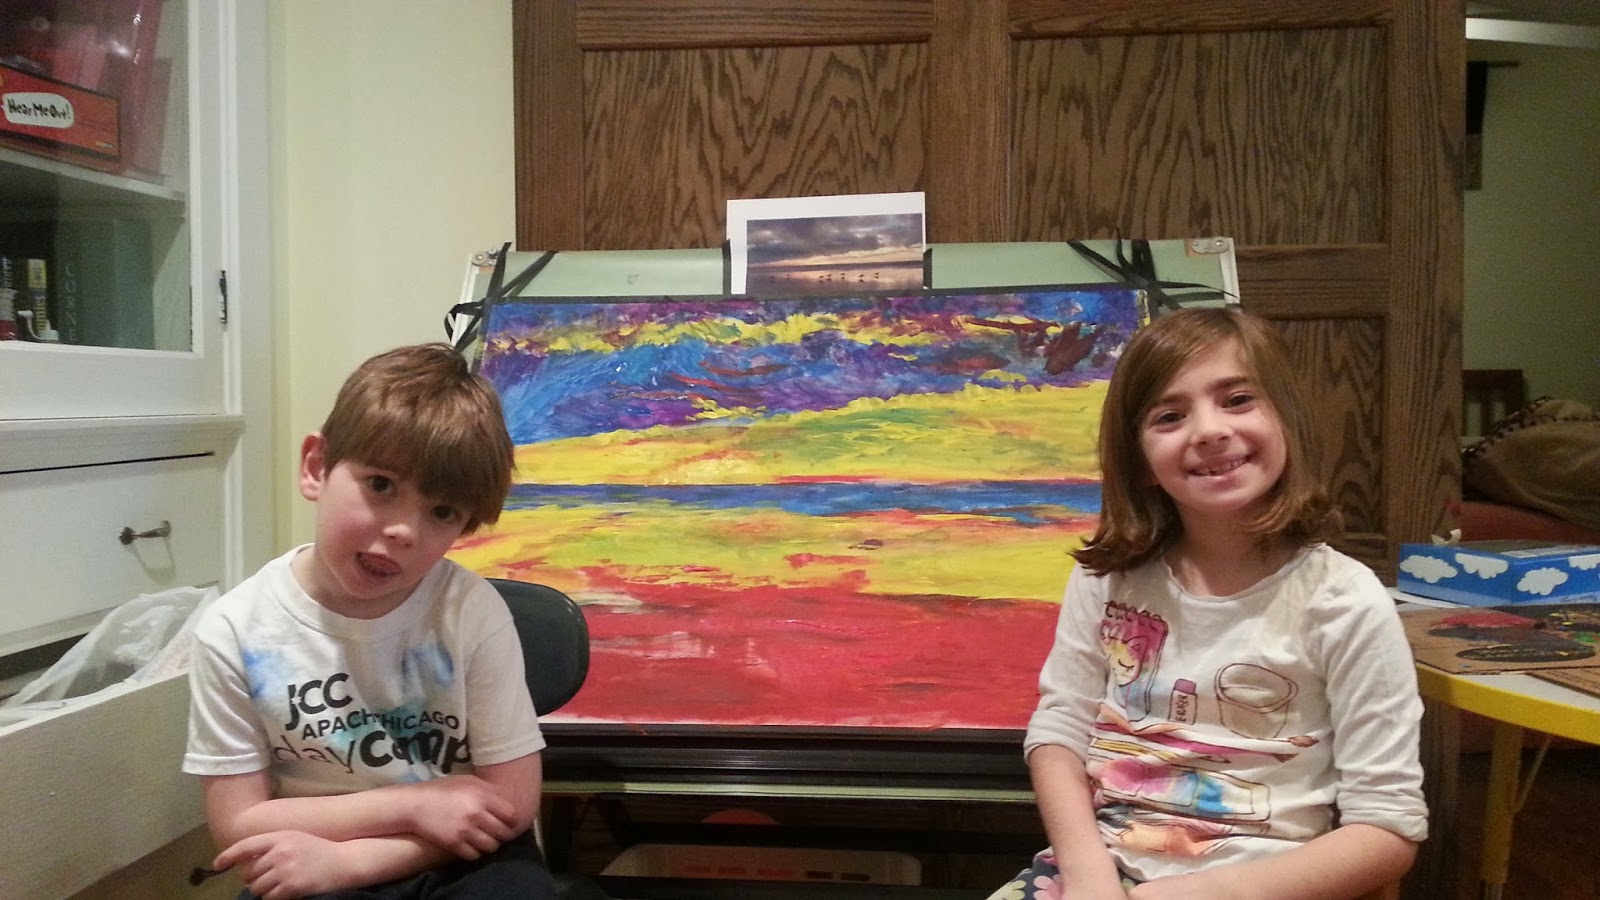
![]() |
| Layer 1 with both kids. |
![]() |
| Layer 2, just me and my girl. Layer 3 (final layer) this weekend. |
Tuesday, February 11, 2014
HP Kids
Along with some other interior design work, we are creating bedrooms for two boys on the North Shore. The design must balance changing needs of growing kids, mess management, and an aesthetic that can appeal to both children and their parents. As with many of our projects, we are trying to maximize space. A large storage cabinet keeps clutter out of site while some open shelving still allows display. Keeping lighting off the surfaces creates varied light levels and frees up much needed space.
Monday, February 10, 2014
Ashley Basement
We just have about come to completion on our Ashley Basement Remodel in Long Grove, IL. A great study in how to make a big impact without breaking the bank. Making certain choices where you really want the architecture to "pop" and making smart careful decisions in other areas where costs can be conserved. This image shows the culmination of this approach. Tongue and groove cedar siding was used to clad the stair wall while ikea cabinetry was altered and customized to create a bar. To the left, a large storage area was created using the ikea wardrobe series. It's a great way to get deep storage cabinetry that is totally customizable. The hanging ceiling fixture, also from ikea, makes a great statement and is fun and cheerful in the designated kids play space. Even the selection of white cabinetry in the kids area vs. the grey cabinetry in the tv area and bar create this distinction of spaces.
See our Facebook page for additional photos of this project.
Ashley Basement Facebook Album
See our Facebook page for additional photos of this project.
Ashley Basement Facebook Album
Thursday, February 6, 2014
Touch This Earth Lightly - The Inspiring Work of Glenn Murcutt
Why are we so passionate about design? Sometimes we need a
reminder. While we work on a variety of projects from selecting wallpaper,
paint color and pillows to designing large scale additions with new kitchens,
bathrooms, etc., we strive to have some focus with each project: some element of
interest, balance and perfection. For
us, it has become increasingly important as designers not to lose that spark,
or when it starts to slip out of reach, to be reminded of how design can have
an impact.
Taking a step back and looking at others work can help provide
us with insights and reflection into why the profession is so meaningful, and
why our decisions matter.
Here are some of the works by Glenn Murcutt;
considered by many to be the greatest living architect. We’re inspired by him and many other architects and designers and thought we’d share a bit with you. Maybe his work
will inspire you as well.
In his Marika Alderton House, Murcutt addresses the issue of prototype housing for a family that was living in a typical aboriginal type home. Studying wind, solar and environmental impacts as well as construction methods led him to create a design that is simple and elegant. Simply constructed, it hovers above the ground. While his other projects are certainly larger in scale and fitted out with modern materials and amenities, the simplicity of the elements of this home are inspiring and clearly a thread that runs through all of his designs.
http://www.ozetecture.org/2012/marika-alderton-house/
J+C MPink
Labels:
Glenn Murcutt,
Global Architecture
Friday, January 31, 2014
PLANNING TO RENOVATE? - MPINK THOUGHTS
Are you planning to renovate a space in your home this spring? Maybe your project needs to be completed by July 4th or even by Thanksgiving 2014? The question of when to start designing your project is one that people don't actually consider until it is too late. Watching renovation shows on tv can lead you to believe that in one short weekend, you can have a brand new kitchen or bathroom. The reality is projects take time on all ends to develop in both design and construction.
The designer needs time to bounce ideas off of the client, and home owners need time to consider their options, understand the design, see materials and products in person, and fully understand what their spaces will look like when the project is completed. There are also schedules to consider. It may be difficult for you to find time in your busy schedule to meet with a designer or contractor. Being rushed into a design decision because the clock is ticking can lead to regret. Take your time and ask questions of your designer, even if they seem trivial.
So, the short answer is once you've decided you are considering doing a project, contact a design professional and get the ball rolling. Have the designer measure the spaces you are planning to renovate and start drawing options for you so you can decide if your project is worthwhile. The designer will most likely come up with new ideas you haven't considered and potentially show you that your original schemes for your space may not be feasible. Winter is the perfect time to start thinking about projects you are planning to start construction on in the spring, summer or fall of the same year. Give yourself time to truly develop your project into one you will love.
Good luck and let us know how we can help you!
J + C - MPink Design LLC.
The designer needs time to bounce ideas off of the client, and home owners need time to consider their options, understand the design, see materials and products in person, and fully understand what their spaces will look like when the project is completed. There are also schedules to consider. It may be difficult for you to find time in your busy schedule to meet with a designer or contractor. Being rushed into a design decision because the clock is ticking can lead to regret. Take your time and ask questions of your designer, even if they seem trivial.
So, the short answer is once you've decided you are considering doing a project, contact a design professional and get the ball rolling. Have the designer measure the spaces you are planning to renovate and start drawing options for you so you can decide if your project is worthwhile. The designer will most likely come up with new ideas you haven't considered and potentially show you that your original schemes for your space may not be feasible. Winter is the perfect time to start thinking about projects you are planning to start construction on in the spring, summer or fall of the same year. Give yourself time to truly develop your project into one you will love.
Good luck and let us know how we can help you!
J + C - MPink Design LLC.
Labels:
lakeview design,
Renovating Chicago
Monday, November 4, 2013
Hyde Park Bathroom
A variety of patterns, scales, colors and materials make up this Master Bathroom remodel in Hyde Park. While we couldn't do anything to fully open up the bathroom, we used a layered approach to create a more spacial feel.
Wednesday, October 30, 2013
Bathrooms Completed Barry Adler
We've completed the bathrooms at the Adler Barry remodel project and have moved on to furniture. Here are some finished photos of the master bathroom. Click photos to enlarge.
General Contractor: Tiedmann Enterprises.

General Contractor: Tiedmann Enterprises.

Finished Photos Barry Bar. East Lakeview, Chicago.
A few new images of this bar project for a condo in Lakeview. The grey-wash on the cabinetry really worked out well. Both the color and framing bead detail match the doors on the rest of the floor. The faceted tile from Ann Sacks is a perfect tile for a bar and gives it a feel very different from that of a kitchen. Click on images to enlarge.
Friday, October 4, 2013
Adler Barry Remodel
A few new pics of this remodel. We'll soon move into the furniture selection phase of the project. The bathrooms are completed. In the hall bathroom we removed the soffit above the mirror and created a smaller soffit for the medicine cabinet. A custom walnut medicine cabinet has two mirrors a glass shelves in between (glass to be installed). An awkward storage cabinet was removed and a large new shower created. The floor is covered with Bronze penny tiles that look rich and appropriate with the scale of the room. The tub was removed in the Master bathroom and replaced with a new large roll-in shower. Crown moulding, new lighting and a custom vanity make the new space elegant yet simple. Click on images to enlarge.
Wednesday, September 25, 2013
Barry Bar
A second project on Barry Street in East Lakeview. Among other projects in the home, this bar makes a major impact. The client asked for a laundry closet to be relocated and a new wet bar to take its place. Gray-wash cabinetry matches adjacent doors while a rust colored tile backsplash echoes artwork in the home. Hopefully we will have finished photos soon. These pics were just snapped at the site with phones.
| Before Pic of Laundry Room. |
Adler Barry Remodel
The bathroom fixtures in the master bath are all in. The mirror about to be installed in the photo below.
Tuesday, September 24, 2013
We've been working on the renovation of a condo in this elegant David Adler designed building in East Lakeview for some time now and it's turning out beautifully. 2 bathrooms were completely gutted and reconfigured, new flooring throughout, new lighting, new paint on the walls and trim, and new hardware everywhere. It's a spectacular makeover. Below is an in progress shot of the bathroom next to the photo of the original bathroom. Small blue subway lines the shower and the vanity wall. A mirror will soon be installed to finish off the renovation. More pics to come!
New lighting in the library.
Thursday, August 15, 2013
Redwood Lane Remodel
Almost completed. Basement remodel in Northbrook.The new space includes a banquette, bar, exercise room, living space, a full bathroom and craft areas.
Thursday, October 11, 2012
LEAVITT REMODEL
Subscribe to:
Posts (Atom)